
Introduction — What you'll learn and who this is for
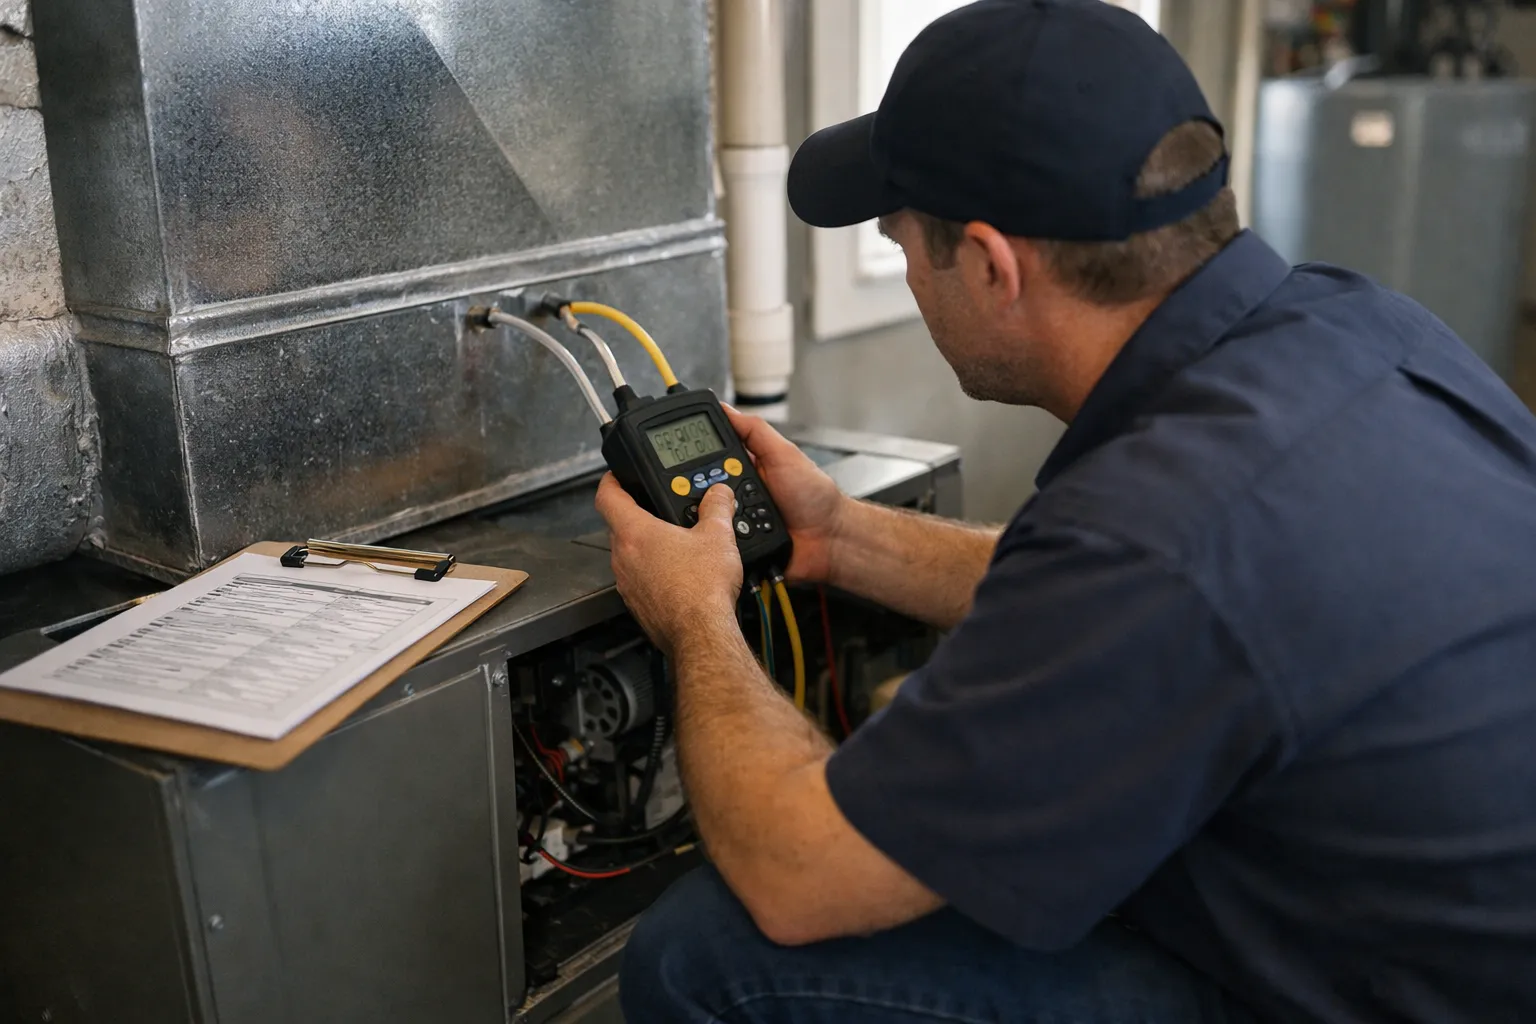
Luxury in a house often reads as stillness: a room that feels uniformly calm at 2 a.m., humidity managed without drama. For modern heat pumps — inverter-driven, communicating systems that dominate mid‑2026 — that composed comfort depends on commissioning: a measured verification process that the installation performs as designed.
This guide is for HVAC enthusiasts, technically literate homeowners, designers, and contractors who want a reliable, documented outcome from a new heat pump purchase (typical residential investment remains roughly $8,000–$28,000 depending on capacity, zoning, and accessories). It updates commissioning best practices for June 2026, incorporating recent tool maturity (wireless diagnostic manifolds, cloud commissioning portals), tighter refrigerant handling norms for low‑GWP agents (R‑32, R‑454B variants), and practical steps that protect efficiency, comfort, and resale value.
Prerequisites / Context — What commissioning means in mid‑2026
Commissioning is a documented, measured verification that an installation meets design intent under real operating conditions. It is not a cursory start‑up or merely pairing an app. In 2026 commissioning routinely includes:
- Measured external static pressure (ESP) and documented delivered airflow (CFM) using an accepted method.
- Manufacturer‑approved refrigerant procedures specific to the refrigerant, expansion device (EEV/TEV), and inverter controls.
- Control and thermostat configuration tailored to the home — placement, setpoints, setback logic, and humidity strategies.
- Digital documentation: timestamped photos, diagnostic logs, and cloud‑stored commissioning records when available.
Why this emphasis now? Two forces converge: equipment complexity and refrigerant transition. Variable‑speed compressors, electronically controlled expansion, and communicating controls make charge, airflow, and control logic interdependent. Meanwhile, low‑GWP refrigerants are mainstream; R‑32 and R‑454B family blends require precise handling, compatibility checks, and tighter charge tolerances than legacy R‑410A (example GWP comparisons: R‑410A ~2,088; R‑32 ~675; R‑454B ~466).
Before commissioning day assemble these items for the technician:
- Exact model and serial numbers for outdoor and indoor units; separate coil model if applicable.
- Manufacturer installation and charging manuals (PDFs preferred).
- AHRI match reference or contractor submittal sheet used at selection.
- Basic house data: conditioned area, recent envelope changes, and any known comfort problems.
Expect the contractor to arrive with calibrated test instruments: a digital micromanometer or wireless pressure transducers, a flow grid or TrueFlow plate (or documented fan tables), temperature/humidity probes, and a digital refrigerant scale and manifold compatible with the refrigerant. In 2026 many technicians also use Bluetooth manifolds and cloud apps that automatically archive readings — request access.
Step 1: Confirm equipment match and installation basics
-
Verify model combinations and AHRI match
Why: mismatches — an unapproved coil/handler combination or swapped blower — quietly reduce capacity and efficiency. Action: ask the technician to show the AHRI reference or manufacturer approval and photograph all data plates (outdoor, indoor, coil).
-
Confirm line‑set practices and oil compatibility
Why: low‑GWP refrigerants and their oils have stricter cleanliness and oil‑compatibility requirements. Action: confirm brazed joints are clean, receiver/accumulator presence if required, continuous insulation on the suction line, and that the oil type matches manufacturer guidance.
-
Inspect condensate management
Why: water damage remains a leading avoidable failure. Action: identify trap location, secondary pan placement (especially in attic installs), float switches or alarms, and clear routes for condensate during freeze/thaw cycles.
-
Check electrical protections and firmware
Why: inverter drives are sensitive to voltage anomalies and outdated firmware. Action: verify correct breaker sizing and disconnect, ask if surge protection was installed or recommended, and confirm the outdoor and indoor units have current firmware per manufacturer notes; if not, schedule an update.
Step 2: Commission airflow first — foundation of all other checks
Fundamental rule: you cannot reliably verify refrigerant charge or controls without verified airflow. Modern controls react to airflow and temperature; wrong airflow masks as charge or logic faults.
-
Measure external static pressure (ESP)
Why: ESP is the duct system’s resistance. Action: drill test ports and record total ESP across the air handler (supply minus return). Compare to the air handler’s published maximum (many residential units are designed around 0.3–0.5 in. w.c.). If measured ESP approaches the limit, expect reduced capacity, noise, and increased blower power.
-
Document delivered airflow (CFM) by an accepted method
Why: feelings and register airflow are not proof. Acceptable 2026 methods include:
- ESP + manufacturer fan performance tables (document the table used and the tap location).
- Flow grid or TrueFlow plate at the air handler or filter slot.
- Register hood balancing for room‑by‑room verification when comfort is uneven.
Actionable target: many conventional designs still target roughly 350–450 CFM per ton; check your manufacturer’s specified delivered CFM for each mode. Record method, numbers, and ambient conditions.
-
Measure filter and grille pressure drops
Why: a high‑MERV 1‑inch filter can significantly raise pressure drop. Action: if filter pressure drop is excessive, upgrade to a 4–5 inch media cabinet or enlarge the return grille to preserve airflow while retaining filtration efficiency.
-
Check return capacity and obvious duct leakage
Why: undersized returns or large leaks lead to imbalance and pressure issues. Action: note visible leaks, disconnected boots, or heavily insulated returns; if door slamming or pressure swings occur, consider a more detailed duct test or targeted repairs before final charge verification.
Step 3: Verify refrigerant charge using manufacturer‑approved procedures
With airflow verified, proceed to charge. In 2026 many systems have EEVs, onboard charging algorithms, or require charge‑by‑weight procedures — follow the exact manufacturer method.
-
Confirm the model’s charging procedure in the manual
Why: variable‑speed inverter systems behave differently than single‑stage units. Action: the technician should read and follow the model‑specific manual: some use subcooling targets, others an on‑board charge routine that must be invoked in a service mode.
-
Record stabilised indoor and outdoor conditions
Why: charge targets depend on conditions. Action: log outdoor dry bulb, return dry bulb and wet bulb (or RH), and the stabilized head pressures and temperatures.
-
Log and archive the charge event
Why: “in the green” is not sufficient evidence. Action: request a written log or photos of manifold readings, ounces/pounds added (including any line length compensation), and any diagnostic codes. If the installer uses a manufacturer cloud portal, get a PDF export or access credentials.
-
Track refrigerant inventory and tag
Why: regulations and resale value increasingly require traceability. Action: request a tag or certificate that lists refrigerant type, amount charged, and serial numbers; scanable QR tags that link to the commissioning report are becoming common and helpful for future service.
Step 4: Validate heating performance, defrost behavior, and low‑ambient operation
Cooling checks are necessary but insufficient. Heat pump behavior in low ambient and defrost cycles defines winter comfort and long‑term efficiency.
-
Demonstrate inverter ramping and staging
Why: well‑commissioned variable‑speed systems run long at low output for steady comfort. Action: ask the tech to show low and high outputs, measure supply air temperature delta and runtime at each output, and document how quickly the compressor ramps.
-
Confirm auxiliary heat logic and lockouts
Why: defaults can allow unnecessary strip heat. Action: verify setback behavior, outdoor lockouts for auxiliary heat, and the temperatures at which fossil or electric backup engages.
-
Inspect defrost sensors and drainage clearance
Why: demand‑defrost strategies rely on correct sensor placement and airflow. Action: confirm sensor wiring, placement per manual, and ensure outdoor drainage will remain clear during freeze events. If possible, schedule a cold‑weather follow up to observe real defrost cycles.
Step 5: Commission controls, sensors, and thermostat strategy
Controls make equipment perform for occupants. Commissioning turns hardware capability into lived comfort.
-
Verify thermostat type, wiring, and software settings
Why: many manufacturers now recommend their communicating thermostat or a certified partner. Action: confirm wiring, set the control mode correctly (heat pump vs conventional), and record thermostat firmware and display offsets.
-
Set fan behavior and humidity strategies intentionally
Why: Auto fan and dehumidify modes affect comfort and condensate behavior. Action: choose fan strategy based on climate and humidity goals; in humid climates avoid continuous fan speeds that re‑evaporate condensate. Program any dehumidify‑overcool or blower modulation features.
-
Plan setback and zoning to avoid auxiliary heat use
Why: large setbacks can force auxiliary heat and spike costs. Action: prefer mild setbacks, maintainable schedules, or zone controls; document the setpoint strategy in the commissioning report.
-
Confirm sensor placement and cross‑check readings
Why: thermostat location misplacement will mislead the system. Action: compare the thermostat reading with an independent calibrated thermometer/hygrometer and note offset values in the report.
Step 6: Demand usable documentation and ongoing verification
Commissioning without an accessible record is incomplete. Insist on a commissioning report you can reference — digital preferred.
The report should include at minimum:
- Model and serial numbers for all equipment and coil identifiers.
- Measured ESP, method used, and estimated delivered airflow (CFM) with ambient conditions.
- Filter type/size and measured filter pressure drop.
- Charging method used, measured subcooling/superheat (with conditions), and net refrigerant added.
- Cooling and heating temperature splits, indoor humidity at the time of test, and basic heating verification readings.
- Thermostat/control settings: staging, aux lockouts, fan mode, and any dehumidify settings.
- Photos of line‑set routing, brazed joints, electrical connections, condensate routing, and installed sensors.
- Any firmware versions updated and cloud portal access details or exported logs.
Why digital? Many manufacturers' commissioning apps will store time‑stamped logs, runtime histograms, and diagnostic snapshots. Request PDF exports or shared folder access and retain these files for warranty and resale transfer.
Common mistakes that keep new heat pumps from performing
- Charging before verifying airflow. Wrong airflow makes a correct charge meaningless.
- Ignoring static pressure. High ESP reduces capacity, increases noise, and stresses blowers.
- Accepting default thermostat firmware and settings. Outdated firmware and generic defaults can negate inverter advantages.
- No refrigerant traceability. Without a tag or log, future service on low‑GWP systems is harder and warranty claims become unclear.
- No follow‑up during representative conditions. An initial summer commissioning may not expose winter defrost or low‑ambient issues — schedule a cold‑weather check if possible.
Pro tips for enthusiasts who want exceptional results
- Require commissioning in the contract. If the installer will not provide measured airflow, ESP, and charge logs, consider a different contractor or an independent commissioning specialist. Many incentive programs and some utility rebates now request commissioning proof.
- Ask for room‑by‑room balancing if comfort is uneven. Register and zone balancing can markedly improve perceived comfort without changing equipment.
- Opt for a larger filter cabinet early if you plan high‑MERV filtration. A 4–5 inch media filter often preserves airflow compared with a restrictive 1‑inch at the same MERV level.
- Schedule a 30–90 day remote follow‑up. With cloud diagnostics, a remote review of runtime, staging trends, and defrost frequency three months after commissioning catches issues that a single visit can miss.
- Retain photos and QR tags with the house file. Future technicians will thank you; it improves continuity and speeds diagnostics.
FAQ
Is commissioning worth paying extra for on a new heat pump?
Yes. Proper commissioning reduces callbacks, secures efficiency and comfort, and documents a baseline for warranty or resale. For most installations it's a small fraction of total cost but saves energy, discomfort, and service calls over the equipment life.
What specific numbers should I ask the contractor to record?
At minimum: total external static pressure and the method used to derive airflow (with delivered CFM); final refrigerant verification (subcooling or superheat per the manufacturer); net refrigerant added; thermostat/control settings (staging, aux lockouts, fan mode); and ambient conditions recorded at the time of each measurement.
How do low‑GWP refrigerants change commissioning procedures?
Low‑GWP agents (R‑32, R‑454B family) often have tighter charge tolerances and different oil considerations. Many manufacturers now specify charge‑by‑weight compensation and require strict leak‑free brazing. Follow the model‑specific manual exactly and demand an auditable charge log.
Can commissioning be done remotely or require cloud tools?
Initial physical measurements (ESP, CFM, line pressures) require onsite work. However, many manufacturers' commissioning apps and cloud portals allow remote follow‑up, trend analysis, and firmware updates. Insist on exported logs or access credentials so you can review performance after the visit.
What's the fastest red flag that commissioning wasn't done?
No measured static pressure or airflow documentation in the handover packet. If the only evidence is “it runs,” critical performance variables were likely not verified.
Sources and guidance: consult manufacturer installation and charging manuals; AHRI directories for match verification; ACCA Manuals D (duct system design) and S (equipment selection) for benchmarking; and ASHRAE guidance for residential measurement practice. For code and refrigerant rules, follow local authority having jurisdiction and EPA guidance where applicable.